Insert a team logo at Edkimo is very easy! As a team admin you can upload your school or organization’s logo to the app.
If you are not a team admin, you can still upload your “own image” to your templates. We explain how to do this in the following article: How to insert an image into a template?
Insert a team logo as team admin
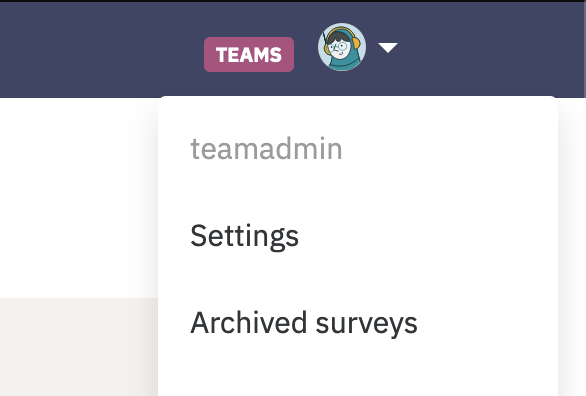
You are in your teamadmin account. To add a team logo to your account, click on the arrow at the top right of your icon and then on “Settings”.
If you have not yet inserted a team logo, you can also simply click directly on the “Upload team Logo” field.
When settings are opened, you can upload one or more team logos.
Where will I see the team logo?
You and everyone in your team will automatically see the selected team logo of your school or organization in the top right corner of your dashboard.

Also the team logo appears in the header area of each new template.
Who will see the team logo?
Team logos are always visible for an entire team. With an Edkimo Teams license, the logo is therefore automatically provided for all team members.
Insert or remove in the editor
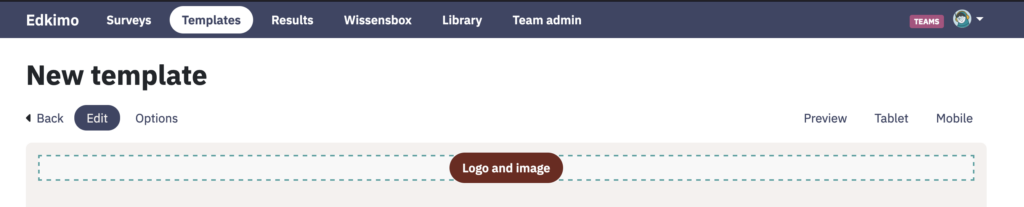
In the edit mode of a template, the team logo can now be added or changed with one click. Click on “Logo and image” at the very top of the edit mode.
All available team logos will appear. Choose the team logo by clicking on it. You can also select “no image”. Then there will be no team logo attached in the header of a template.
Team logo in PDF Download
If you have used a team logo in your template or survey, it will automatically appear in the PDF download of the survey, template and results. The positioning of the team logo is fixed in the design and cannot be changed.